Monday, August 14, 2006

Solaris Live Upgrade (on an SVM mirror set)

Many of you have probably heard of Sun's live upgrade feature by now. Live upgrade essentially lets you upgrade your system from one Solaris version to another with minimal downtime. If done right, the only downtime you need to suffer is the time required for rebooting your server.

Live Upgrade works like this:
  • Create a "boot environment" (BE) representing your current system
  • Create an "alternate boot environment" (ABE) which is a clone of your BE
  • Run a Solaris upgrate against the ABE
  • Switch the active "boot environment" to the ABE
  • Reboot
Seems simple enough, right? Well, on the surface it does seem simple. There's just one problem. You need an empty partition to use as the ABE! You know what really annoyed me though? Most of the LU examples and docs I've read seem to involve using some random extra scrap of a partition for the ABE. Well, as you can probably guess, the ABE becomes your system boot partition at the end of this process. Do you really want some random scrap partition to be your system partition for the long term? I certainly didn't.

This whole procedure is also easier if you separate your system partitions from your data ones. Yes, I know this is normally a good practice. However, I've grown to just use a huge "/" and smaller "/var" on most of my machines these days. It's just easier, and I still have "/home" on an external file server.

So what was I to do? The Solaris 10 6/06 DVD set was here, and I wanted to upgrade. (my server was running the original Solaris 10 release) I needed something large to make my ABE on, but also needed it to be somewhere I was comfortable using as my long-term boot drive. I also wanted to avoid involving anything beyond that server itself. Then it occured to me... the "system disk" of my server was actually an SVM mirror set!

In short form, here was my plan of action:
  • Make a backup (thankfully this machine has a DDS3 drive installed in it)
  • Remove the second disk from the mirror and unconfigure its meta devices
  • Run live upgrade, using that second disk as the ABE
  • Switch the default BE to the one on the second disk
  • Boot off the second disk, into the new version of Solaris
  • Make sure the server is still working correctly
  • Unconfigure the mirror devices in SVM
  • Recreate the meta devices on the second disk, mirrors containing them, run metaroot, etc.
  • Reboot again
  • Add the first drive back into the mirrors
Seems simple enough, right? ;-) When all is said and done, the goal was to have the same drive configuration before. The only differences would be that my mirror components would be reversed, and I'd be running a newer version of Solaris.

While I should now show a complete walkthrough of what I did, a full post-mortem reconstruction would be rather tedious. Besides, if you're familar with SVM and can read through Sun's LU docs, following my strategy should be straightforward and simple. (yes, it does work) Just remember to install the recommended patches before using LU, or it'll fail.

Also, I strongly recommend mounting the upgraded ABE before that first reboot. You should then check the "/var/sadm/system/data/upgrade_cleanup" file for any changes of interest that it made. I failed to do this myself, and wound up having sendmail misconfigured for several hours. On the bright side, it does make backup copies of any configuration files that it changes.

Good luck!

Fun with Solaris 10 6/06 and ZFS

The 6/06 release of Solaris 10 finally incorporated ZFS as part of the operating system. This is quite exciting, because now we can start using ZFS without having to run a Solaris Express or OpenSolaris distribution. As such, I was itching to try it out. I started by ordering the "Solaris Enterprise System" DVD stack from Sun. Sure, I could have downloaded it, but its nicer to have a whole set of media already there for me.

Now I needed a test system... So I dug out my older Ultra 60 workstation, hooked up a DVD drive, and a few hours later I was good to go. Thus far, the only real change I noticed from the original Solaris 10 release was a newer and nicer looking login screen.

Time to hook up a boatload of hard drives! I had an expansion box from my now-since-decomissioned CLARiiON FC RAID monster, good to go with 10x36GB 10krpm FC hard drives. All I needed to do was connect them, reformat them with a normal block size (they were formated for 520 bytes instead of the normal 512, thanks to the CLARiiON controller), and I'd be good to go. Unfortunately, all I had to connect them to was a QLogic QLA2100 FC HBA. The QLA2100 isn't supported past Solaris 8, or so they'd lead you to believe. Thankfully you just have to get the Solaris driver, unpack it from the package stream QLogic provides, modify the package to not complain about your Solaris version, and install it. As expected, it then worked just fine.

To fix the block size on the drives, I got the "scu" utility from here, and then followed the instructions on this page. All pretty straightforward, but it did take about an hour per drive. It doesn't really do much I/O to to the drive from your system, though, so doing all the drives at once does speed things up.

Finally, I went through "format" on each drive to fix the annoying "bad magic" messages. Now I had 10 drives off the end of an FC link, all set and good to go!

Setting up ZFS was really easy. If you haven't done so yet, I strongly recommend going here to review their documentation and screencasts. The specific commands are really easy to figure out, but that site shows them to you. Essentially, with ZFS, you make a pool out of mirrors, RAID-Z sets, or individual disks. You can then chop up the pool however you see fit.

In any case, I tried a few configurations and ran some benchmarks. Keep in mind that testing with "dd" and a large block size will ALWAYS yield better results than you'll ever see on a real benchmark program. (I think I got up to 80MB/s with "dd" at some point) Also, running multiple benchmark programs or "dd" sessions in parallel may also yield higher throughput. FYI, I was connecting to all 10 drives over a single 100MB/s FC link. So on with the results!

One 10-drive RAID-Z set

$ bonnie++ -d . -s 2G
Version 1.03 ------Sequential Output------ --Sequential Input- --Random-
-Per Chr- --Block-- -Rewrite- -Per Chr- --Block-- --Seeks--
Machine Size K/sec %CP K/sec %CP K/sec %CP K/sec %CP K/sec %CP /sec %CP
proxima 2G 14685 91 35308 48 23733 49 13301 92 52396 50 512.1 13
------Sequential Create------ --------Random Create--------
-Create-- --Read--- -Delete-- -Create-- --Read--- -Delete--
files /sec %CP /sec %CP /sec %CP /sec %CP /sec %CP /sec %CP
16 4798 99 +++++ +++ 7455 99 5230 99 +++++ +++ 7350 97
proxima,2G,14685,91,35308,48,23733,49,13301,92,52396,50,512.1,13,16,4798,99,+++++,+++,7455,99,5230,99,+++++,+++,7350,97


One 5-drive RAID-Z set

$ bonnie++ -d . -s 2G
Version 1.03 ------Sequential Output------ --Sequential Input- --Random-
-Per Chr- --Block-- -Rewrite- -Per Chr- --Block-- --Seeks--
Machine Size K/sec %CP K/sec %CP K/sec %CP K/sec %CP K/sec %CP /sec %CP
proxima 2G 15241 94 32991 44 24989 45 13676 93 58862 52 550.2 10
------Sequential Create------ --------Random Create--------
-Create-- --Read--- -Delete-- -Create-- --Read--- -Delete--
files /sec %CP /sec %CP /sec %CP /sec %CP /sec %CP /sec %CP
16 4821 97 +++++ +++ 7509 99 5190 98 +++++ +++ 7849 99
proxima,2G,15241,94,32991,44,24989,45,13676,93,58862,52,550.2,10,16,4821,97,+++++,+++,7509,99,5190,98,+++++,+++,7849,99


Two 5-drive RAID-Z sets

$ bonnie++ -d . -s 2G
Version 1.03 ------Sequential Output------ --Sequential Input- --Random-
-Per Chr- --Block-- -Rewrite- -Per Chr- --Block-- --Seeks--
Machine Size K/sec %CP K/sec %CP K/sec %CP K/sec %CP K/sec %CP /sec %CP
proxima 2G 15051 92 30531 41 26045 47 14018 93 57507 56 864.6 12
------Sequential Create------ --------Random Create--------
-Create-- --Read--- -Delete-- -Create-- --Read--- -Delete--
files /sec %CP /sec %CP /sec %CP /sec %CP /sec %CP /sec %CP
16 4908 99 +++++ +++ 6800 95 4868 99 +++++ +++ 5847 81
proxima,2G,15051,92,30531,41,26045,47,14018,93,57507,56,864.6,12,16,4908,99,+++++,+++,6800,95,4868,99,+++++,+++,5847,81

Friday, February 10, 2006

Air Travel and Mobile Computing

Almost since their inception, laptop computers have been an increasingly popular implement of the air traveler. You see them used both in airports and on airplanes, by more and more people. However, airports and airplanes today do not provide a friendlier environment for laptop users than they did years ago.

Problem #1: Electrical power
Regardless of what the makers of DC-DC converter bricks may tell you, most airplanes are not equipped with DC power outlets for passengers. Occasionally you might find them in first class, and I once saw them in coach on a short Orlando-Atlanta flight, but normally they are simply not available. As such, the only solution is having laptops with good battery life, and topping them off at airports in-between flights.

Airports, however, aren't that great either. Outlets in sitting areas tend to be very scarce, and often squatted by other laptop users or people who don't even realize they're in the way. I frequently find myself scouring the entire food court, or the entire gate waiting area, only seeing one or two outlets. Even then, I'm lucky to get access to them.

Problem #2: Internet access
Access while on airplanes is something we presently don't expect, and thus can live without. After all, for most domestic trips, the airlines don't want to keep you on the same one for more than 2 hours anyways. Sure, there is talk about installing access, but you all know how that's going to be done. It'll be prohibitively expensive, and/or only offered to first class, and will wind up being practically unavailable to your average laptop-toting passenger. (Remember the sky phones?)

Airports, however, have been installing Wi-Fi access points all over the place. Except, they do it in a way that makes it nearly useless. First, they all insist on charging for access. This is a problem because even though it is usually cheap, it is still hard to justify $5.95-9.95 for a 10 minute E-Mail check between flights. (thankfully I can use GPRS on my cell phone instead) If you are a frequent traveller, they do have monthly access plans. Of course every airport's Wi-Fi installation is managed by a different organization, and thus these plans are worthless unless you fly the "exact same trip" with long layovers on a regular basis. In essense, airport internet access is implemented in such a way that it is practically useless to most travelers on a 1-hour layover. (Well, at least until there are popular programs that can tunnel IP over DNS and ICMP, which are the only things their proxies seem to let out onto the global internet.)

Monday, February 06, 2006

New blog!

My blog on LiveJournal was more like a collage of personal ramblings and reflections, and the blogs there from various friends of mine were also like that. As such, I've decided to separate out the technical content. Below you'll see a bunch of technical posts that I've copied over here. In the future, I hope to put all my technical postings on this site instead.

Why am I doing this? Well, the reasons are two-fold. First, most technical postings on LJ would get lost in the noise of personal-life ramblings from everyone on everyone else's friends pages. Second, I'd rather post these in a forum open to people that really have no need nor desire to know about any of my own personal-life ramblings.

I'd also like to have a personal tech blog to complement my efforts on this website:
Household Enterprise Computing

As well as my tinkerings with this excessive collection of operational computer hardware:
Logicprobe Systems List
(or any of the many less-operational boxes that I didn't bother to list there)

If anyone still wants to know exactly what I consider "Household Enterprise Computing" to be, here is a good writeup that I did a while ago.

Sunday, December 18, 2005

The Objective Rack - Mark IV

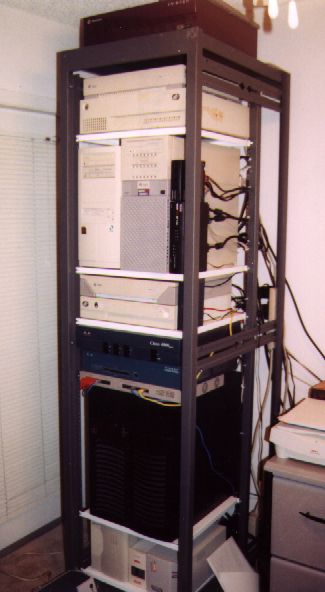
Behold, the The Objective Rack - Mark IV!

This whole rack-rebuild project took most of Saturday. Thankfully everything of mine came up ok afterwards. Unfortunately a friend's server (that I've started hosting as of last weekend) didn't come up so easily. After a whole night of frantic tinkering attempts, I backed up all the data I could salvage and we reinstalled it this morning.

This is but the latest in a continual cycle I go through....
1) Build rack all nice and neat
2) Use new setup for a while
3) Gradually decide to change things over time (add new machines, remove old machines, etc.)
4) Decide that the once-elegant rack has become a mess of tangled wires and ad-hoc mounting
5) Tear it down and repeat from step 1.

As I said, this is the 4th iteration of my attempts at building a rack of computer equipment for my personal use. Here's the history in chronological order:

Mark I - Moved to an apartment in Florida, bought the rack in the process, got everything all setup. Many of my systems weren't rackmount, so I used a lot of rack-mount shelves.
Mark II - Upgraded a lot of equipment, had a lot of new stuff to mount (including an E4000 and a big RAID box), and took the desktops out of the rack. First use of the term "objective rack".
Mark III - Moved from the apartment to a house, finally had the proper mounting kit for the E4000, needed to get everything setup again.
Mark IV - Retired some of the more power-hungry equipment (E4000 and big RAID box), changed a lot of systems around, had some new equipment and cable-guide stuff to integrate.

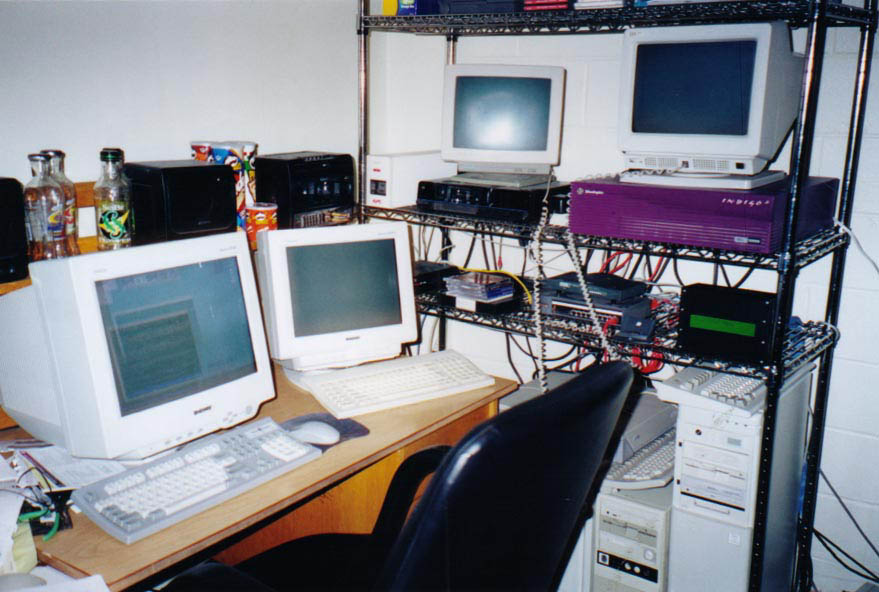
Prior to the rack, I went through a series of wire-shelf-based setups. These began my sophomore year of college with this setup, and continued with a new iteration every academic year.

Tuesday, December 06, 2005

Fun with LDAP and Kerberos

Several weeks ago I decided that I want my firewall to no longer be a Solaris machine, and that I wanted a dedicated authentication/utility server. The goal was to decouple my internal utility services (authentication, DNS, NTP, etc.) from my main servers. So I dug up a cheap 1U server, put FreeBSD on it, made it my firewall/internal-router/external-DNS/et
c. box, and took my Netra T1 out of production.

Since the Netra T1 was to be the new auth server, I began last week by blowing away its prior installation and giving it a fresh load of Solaris 10. (note: always remember to make the small dedicated partition for the SVM metadb replicas *before* installing Solaris) I then got my internal DNS migrated to it, as well as NTP.

For a while, I was running good 'ole NIS to do my distributed user accounts. Of course its an old protocol, and everyone says to upgrade, but it "just f**ing works", and I can configure it in my sleep on just about any *nix. Of course the whole point of this auth server was to try something new. Originally I knew I wanted to take a shot at LDAP again, as I've tried (and failed) before, going back to NIS. As I approached this past weekend, and did some reading, I decided to take a bigger chunk and try LDAP with Kerberos.

So on Saturday I brought the Netra out to the LEAP Installfest, and started getting OpenLDAP and the Kerberos that comes with Solaris (SEAM) all installed and configured. By Sunday afternoon, I was still tinkering, and things still weren't yet working right. I figured out how to migrate my NIS accounts into LDAP, knew how to make users in Kerberos, but client authentication just wasn't working right. (it sort-of worked to my FreeBSD server, and didn't work with my Solaris one) I spend way too much time staring at PAM debuging output, and continued to be baffled.

So I said f*ck it, pulled out OpenLDAP, and went and installed "Sun Java System Directory Server 5.2". (which used to be called SunONE *something*, which used to be called iPlanet *something*, which used to be Netscape *something*) The name sounds fancy, but it really is just an LDAP server with some graphical (and the usual command-line) admin tools.

After tinkering all night, it was almost working. In the morning I figured out the magic extra LDAP user parameter to finally get authentication working. So by sometime Monday morning, I could do name lookups and authentication against the SJSDS LDAP server from both my Solaris and FreeBSD servers. However, while I had SSL configured on the LDAP server, it wasn't reaching down to the clients.

I spent all of last night attacking the SSL issue... You see, LDAP isn't really a good authentication protocol (which is different from an authorization/lookup protocol, which it is decent at). Without SSL, you have 2 authentication types... simple (your client sends your password IN CLEAR TEXT over the wire to the LDAP server), and CRAM-MD5/DIGEST-MD5 (the password isn't in the clear on the wire, but it is IN CLEAR TEXT in the LDAP database itself. (thus breaking my desire for password-hash compatability with the data I imported from NIS) In any case, but the end of the night, I got simple authentication with SSL working. Thus, no cleartext passwords anywhere.

Then tonight I got brave again... You see, the Sun JSDS docs do have a good writeup on integrating Kerberos. But when I initially tried it, the ns-slapd process (the LDAP server itself) kept core-dumping. Apparently, this was a known issue according to the release notes, and there was even a fix (which worked!). So as of the middle of this evening, I actually succeeded in getting LDAP+Kerberos fully functional across all my remote-access systems. I even figured out how to convince PAM on my Solaris server to use SSL LDAP authentication for users that don't yet have a Kerberos principal. (couldn't figure out how to tweak PAM to do that seemlessly on FreeBSD, though.) Now that Kerberos is working, its only a matter of time before I find myself fully taking advantage of what it has to offer.

In any case, I think I've conquered LDAP+Kerberos. Next step is to eventually get around to figuring out exactly what I did, and producing a detailed technical writeup to help others in the future. (sure, the web is full of such writeups, but they're all partial and I needed to piece together hints from all of them to get things working.)

Monday, October 31, 2005

Reflections on uber-geekness...

As extreme and weird as we may seem in our computer-related projects, the truth is that we're often doing the same things as normal users. Its just that we find much more sophisticated ways of accomplishing them...

Normal people use laptops to get computing anywhere in the house.
Ubergeeks deploy a server infrastructure with a hot-desktable thin-client solution.

Normal people check e-mail through their ISP or something like gmail/hotmail/etc.
Ubergeeks run their own e-mail server with IMAP+SSL, SMTP AUTH, and server-side mail filtering.

Normal people use their desktop PC when they need to run a Windows application.
Ubergeeks install Windows 2000 Server on a SunPCi card in their Sun enterprise server and install Citrix Metaframe Presentation Server to provide multi-user Windows application access authenticated through Samba, and still refuse to play Snood.

Normal people listen to MP3s with WinAmp or iTunes off their desktop's hard drive.
Ubergeeks mount an NFS export from their RAID file server and play the MP3s in XMMS.

Normal people watch movies off their DVD player or their cable services.
Ubergeeks construct network-booted machines running MythTV to stream movies off their RAID file server.

Normal people buy telephones at Walmart and use them to talk to their friends.
Ubergeeks run Cat5e across their houses, and deploy an IP Telephony solution through an Asterisk box.

Normal people think a "router" is an $80 Linksys box you buy at CompUSA that lets them connect multiple PCs to the internet.
Ubergeeks think a "router" is a multi-service rackmount Cisco device with ethernet, T1, and frame-relay interfaces, capable of supporting OSPF and BGP.